This article will demonstrate how to use LifeYield’s Import from CSV/Excel functionality.
Using this import function is necessary for advisors in the following scenarios:
- Creating a portfolio from an exported CSV/Excel file from their trading platform
- Importing single or multiple accounts to an existing portfolio simultaneously
- Perhaps a prospect sends a portfolio statement PDF and it’s easier to transfer the PDF to an excel document versus building the prospect's portfolio directly in LifeYield
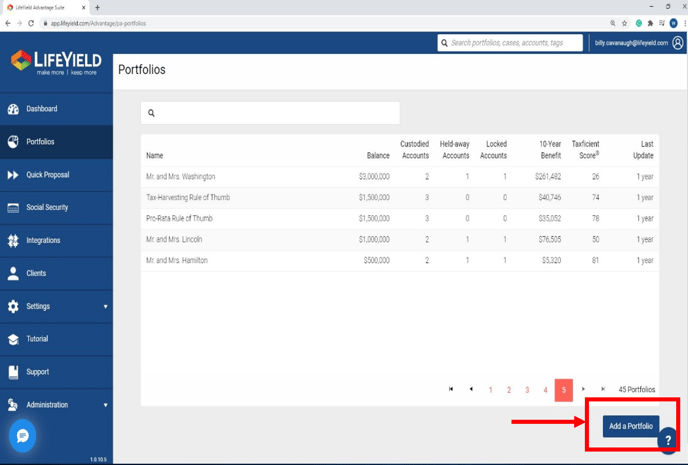
Within the Portfolios tab, click on the Add Portfolio button in the bottom right.
This will be the starting point if you are building a portfolio from scratch and will create a new portfolio for you. You will then have to add the new portfolio details which include the following:
- Portfolio Name
- Capital Market Assumptions
- Investment Timeframe
- Target selection
- Your client/prospects short-term and long-term tax rates
Once the portfolio details are entered in and you click on the Save button, a new empty portfolio will be created and LifeYield will automatically open the newly created empty portfolio.
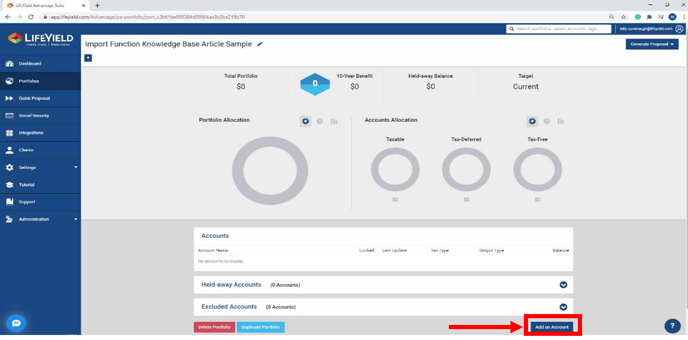
Next, click on the Add an Account button. This will be where you can enter in the portfolio details once a new portfolio has been created (Account types, positions/securities, cost basis, etc.).
Once the Select Account Source pop-up menu appears, you can choose from the following four methods to enter a client's accounts:
- Category Based
- Security Based
- From Integration
- Import
For this example, please select the Import option.
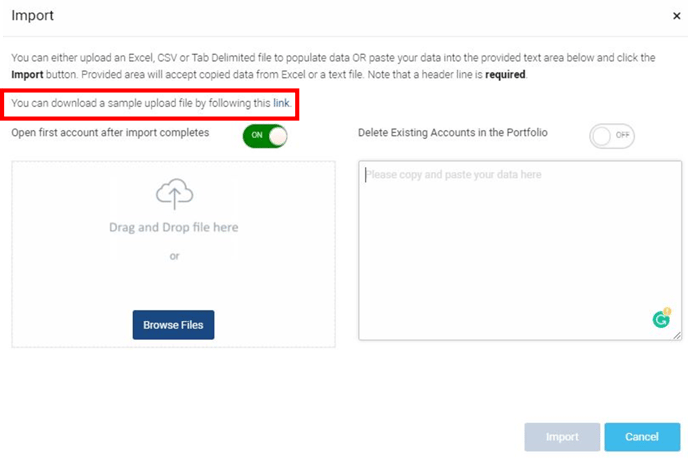
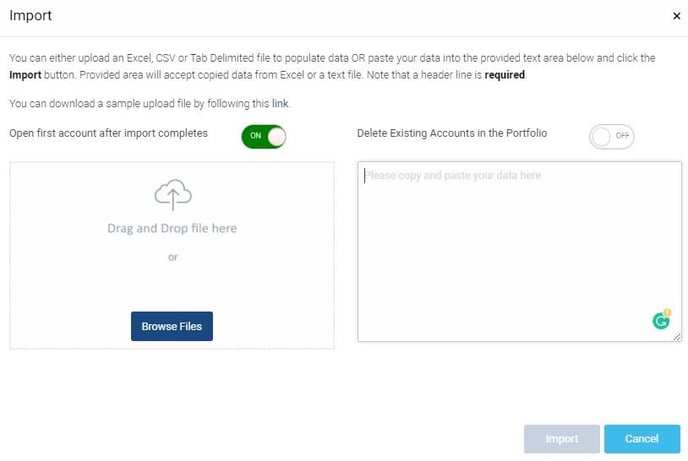
Once Import has been selected, the Import pop-up will open. As shown below, you can either upload an Excel, CSV or Tab Delimited file within the box to the left OR paste the data/cells directly into the provided text area within the box to the right.
Important requirements:
- A header line is required
- Formatting must match LifeYield’s upload file format
In the image above in the red box outlined LifeYield provides a link to a downloadable sample upload file that you should download to make sure the CSV/Excel document that will be imported matches LifeYield’s format required for importing.
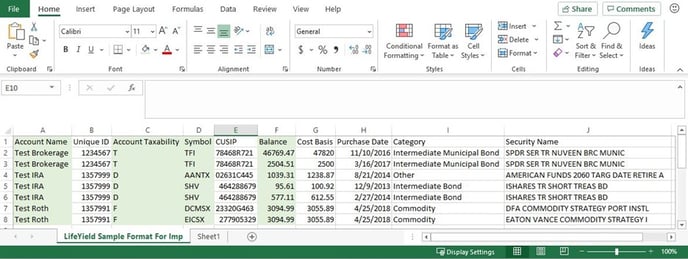
The image above is the downloadable sample file that is available for download with sample portfolio data that is in the necessary LifeYield format for easy importing. Here is everything you need to know about the appropriate format found within this file.
Columns:
- The level of data granularity is entirely up to your discretion.
- The four light green shaded columns are the only columns necessary for easy importing. All LifeYield needs to import multiple accounts using this import function are Account Name, Account Taxability, Symbol, and Balance.
If that level of detail is all that is necessary for the user’s case, deleting all other columns won’t constrain the import function. - There are 6 other columns on this file: Unique ID, CUSIP, Cost Basis, Purchase Date, Category, and Security Name.
If the user has all these details and wants to include the entirety of the 10 columns provided in the above file, they will be able to as long as the data is in the appropriate formatting (formatting details are below).- If you have everything within this sample file, GREAT! Alternatively, if you only have Account Names, Account Taxability, Symbols & Balances, the import function will still work the exact same way.
- The four light green shaded columns are the only columns necessary for easy importing. All LifeYield needs to import multiple accounts using this import function are Account Name, Account Taxability, Symbol, and Balance.
Formatting:
- All of the headers must align with exactly how they appear in the above format, including spelling.
- Account Taxability column is as follows:
- ‘T’ – Taxable accounts
- ‘D’ – Tax-Deferred accounts
- ‘F’ – Tax-Free accounts
- The red box in the above screenshot within the number format must be set to ‘General’
- The ‘General’ number format holds true across all cells on the sample format file besides the ‘Purchase Date’ details.
- Keep the ‘Purchase Date’ column header set to the ‘General’ format but make sure the actual purchase dates in the cells below the header (Blue box) are set to the ‘Date’ Format
Once all the above formatting is complete, your CSV/Excel file is ready for import!
The Import (Two Methods) -
- Method 1:
- Upload Document: Save your excel/CSV file to your computer, click on the Browse Files button and upload the excel/CSV file you saved, then click on the Import button.
- Method 2:
- Copy/Paste the cells directly from the excel/CSV file you created and paste them into the box on the right in the above image, then click on the Import button.
Toggles:
- Keep the Open first account after import completes toggle on the left turned ON if you want LifeYield to automatically open the first account after the import.
- Turn the Delete Existing Accounts in the Portfolio toggle ON the right on if you want to delete existing accounts after import.
You have successfully imported your portfolio via LifeYield’s import function!