Proposal Advantage comes standard with four sets of default CMAs, Level 1 (Locked), Level 2 (Locked), and Level 1 and 2 (Customizable). The Locked sets are LifeYields most current assumptions and categories. The Customizable are copies of the LifeYield set in which you are able to edit assumptions, category names, and add/delete categories if you wish.
The Level 1 CMA Set has six asset categories and is the default used for a Quick Proposal. The Level 2 CMA set is more extensive with 20 asset categories. The Locked CMA sets cannot be edited and are updated yearly. The Customizable sets can be edited and will not be updated at any time by LifeYield.
Here is a quick video walking you through getting started with CMA's, how to edit and duplicate a set.
Advisors and firms can also create their own customized CMA sets. They may do so by either duplicating the LifeYield default CMA sets and editing, including creating new ones by typing in individual asset categories, or by importing CSV or text files using the import function on the Capital Market Assumptions page.
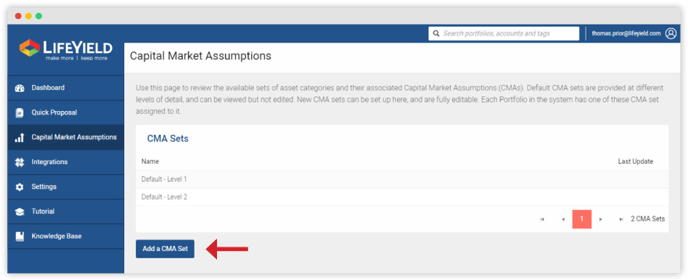
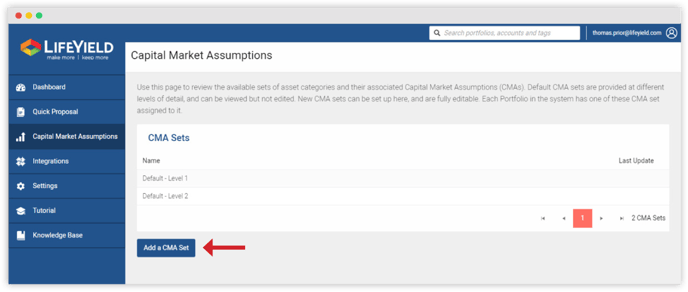
The Capital Markets Assumption tab allows advisors to add their own CMAs, simply by clicking on “Add a CMA Set”.
METHODS TO CREATE A NEW CMA SET
There are four ways in which to add a CMA Set:
- Manually: adding individual categories one at a time
- Importing data: copying and pasting text files
- Importing data: uploading files from your computer
- Duplicating and editing: the LifeYield default CMAs
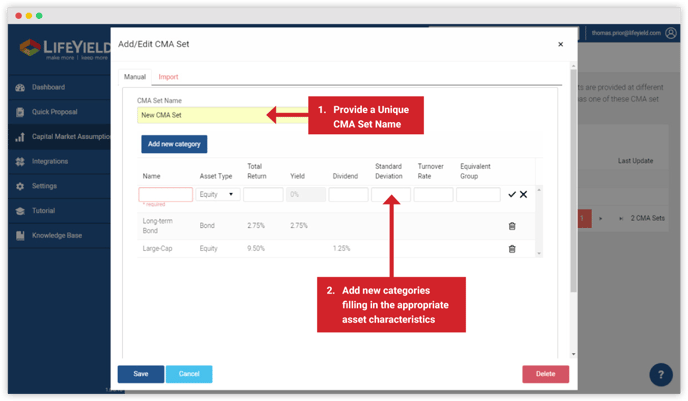
1. MANUALLY ADDING A NEW CMA SET
2. IMPORTING TEXT FILES
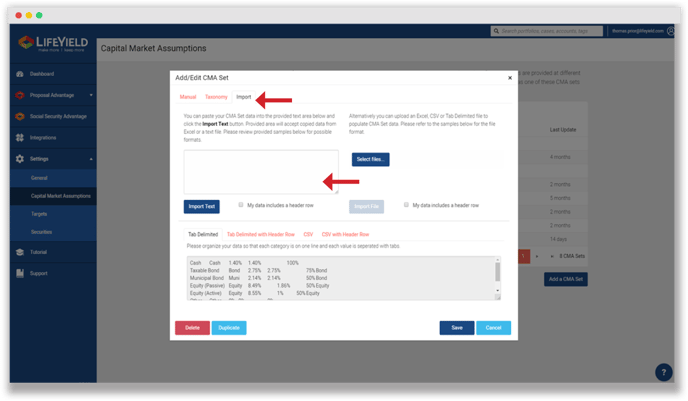
Importing text files allows for copying and pasting of tab-delimited fields from an Excel spreadsheet. (A sample file format is provided at the end of this document.) By clicking on the Import tab at the top left in the Add/Edit CMA Set window, files may then be imported as text by copying and then pasting the fields from your Excel spreadsheet into the field above the Import Text button.
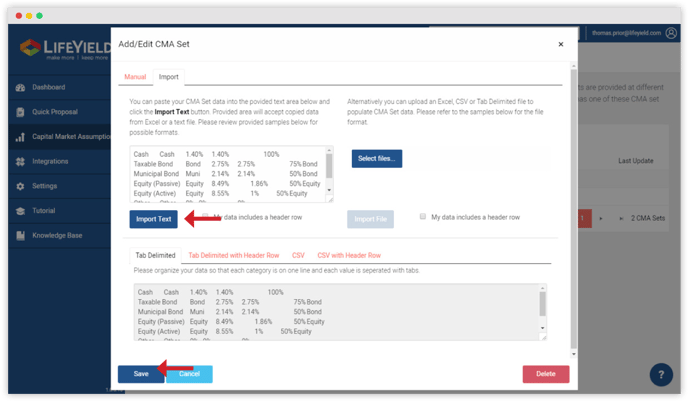
Once you copy the file, hit the Import Text button and then the Save button.
3. UPLOADING FILES
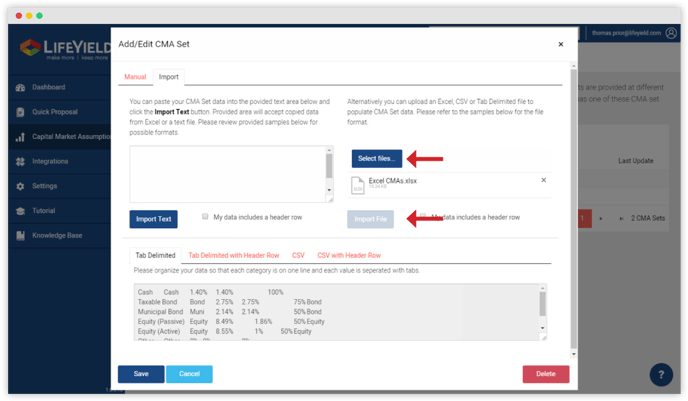
Step One: Click “Select files” and navigate to the file on your computer you wish to upload.
Step Two: Click “Import file” to upload the data. If your data includes a header row, select the My data includes a header row checkbox.
4. DUPLICATING A DEFAULT CMA

LifeYield Default CMA sets may be duplicated by the advisor and used to create a new CMA Set.
Step One: Select default CMA then click on Duplicate.
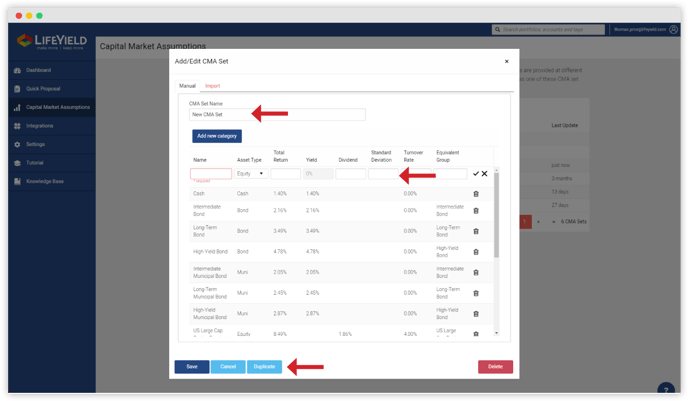
Step Two: Click on the copied CMA Set. A copy of the default CMA may now be renamed and edited by adding new categories and/or deleting or modifying any of the existing categories. When completed click the Save button in the lower-left side of the pop-up window.
5. USING NEW CMA SETS
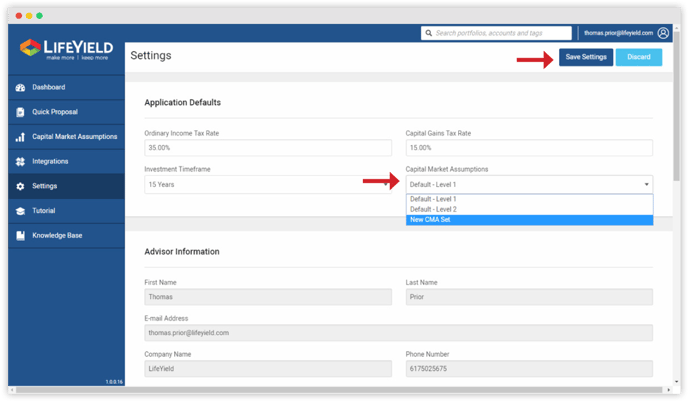
Newly created CMA sets may be included in all new portfolios by changing the Capital Market Assumptions in the Settings page. When completed click the Save button in the upper right.
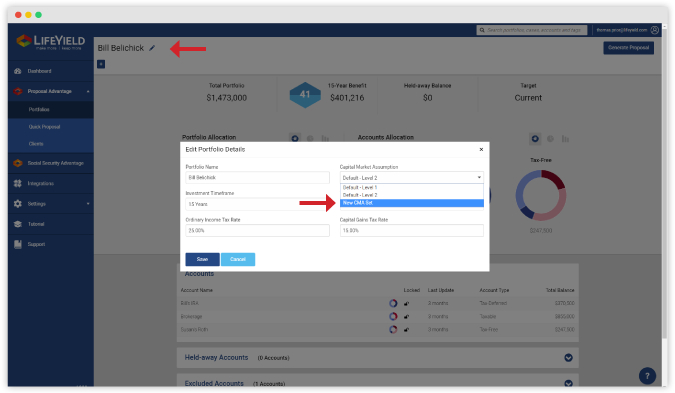
A new CMA set may also be attached to an existing portfolio. Click on the edit pencil by the client’s name in the upper left. In the pop-up window click on the drop-down arrow under Capital Market Assumptions and select the CMA set you now want to associate with this portfolio. Click the Save button.
Sample Tab Delimited CMA file
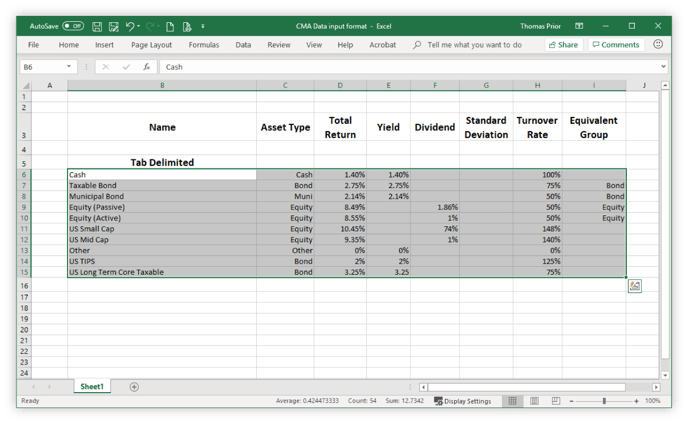
Create your CMA's in an Excel spreadsheet using this format. Copy the fields as shown above and paste into the Import Text field. Standard Deviation statistics are optional. These statistics are infrequently used by LifeYield, however, you must include the column even if blank so that the file is properly imported into LifeYield.